


 When I pulled out our Christmas stockings this year I knew they needed to be redone. While I still like the stockings I made a few years ago, there simply aren’t enough to fit our family. I made the last ones when Saige was a baby, and since we’ve added two more girls to the family it was just time to make new ones so everyone has one. And I want them to match so I’m not just making one new one. I like a traditional shape with a contrasting band at the top of my Christmas stockings. I also choose not to put names on them–you never know when you’re going to want to use one for a guest and I’ve given up mine the past couple of years for the girls and I was glad it didn’t have a name on it.
  I’ve given several sneak peeks of my Christmas stockings over on Instagram (@mabeyshemade it–come follow me!) and even asked if a stocking pattern was something you’d want and the answer was Yes! So I’ve drawn up a pattern for you and instructions for you to make your own complete with HTV embellishments.
Christmas Stockings Supplies:
- Download the Pattern (download from the link, then cut and tape the 4 pages together to get the pattern ready for use)
- 1/4 yard main fabric
- 1/4 yard lining fabric
- Sewing machine
- Pinking shears (optional, but nice)
- Silhouette or Cricut cutting machine (or a craft knife)
- Heat transfer vinyl (I used silver from Expressions Vinyl)


- Ribbon
Instructions:
- Cut two main pieces and two lining pieces from your fabric using the stocking pattern. The main stocking pieces are 4″ shorter than the lining pieces.


- With right-sides together (RST), sew the lining pieces together using a 3/8″ seam allowance. Repeat for main pieces.


- Clip your seam allowances around the curves. This is where I use the pinking shears, but if you don’t have any, just clip little slits into the seam allowance up to (but not through) the stitching all around the curves.


- Flip the main stocking to the right side, and slide it inside the lining making sure the toes of the stocking are pointing the same direction. This will help you get RST.


- Sew along the top edge of the stockings leaving a 2″ gap and then turn the stockings right sides out. Now is a great time to press all your seams flat.


- Stuff the lining into the main stocking leaving 2″ of the lining sticking out of the top of the stocking. Then topstitch all around the stocking where the lining and main pieces meet up.


- Tack a small piece of ribbon to the side of your stocking.
- To cut a design from heat-transfer vinyl (HTV), buy or design some basic shapes using your Silhouette. I made the star, but had previously bought the other basic shapes. Then cut them using your Silhouette with the shiny side down. I needed to use a blade setting of 3 with 14 depth to get a clean cut.
- Weed your designs by pulling all the excess vinyl off the plastic sheet already on the back of the vinyl.


- Place the design on your stocking with the plastic facing up, then press with a hot iron with a pressing cloth between the plastic and your iron.
- Peel the plastic off, and then I always give my design one more press to make sure the edges are really stuck down.


- Repeat the ironing process if you have an additional color (like I did with the holly berries and bell).
 They’re simple stockings that you can embellish any way you want with embroidery, ribbon, trim, or (of course) vinyl. Just do what makes you happy! And I’ve joined forces with some other talented bloggers to see what they could do with Christmas stockings and HTV. Make sure you go check out a few! Over at the Expressions Vinyl Facebook Page they are having a rock your Christmas stockings contest! People can upload a picture of a stocking they fancied up using vinyl! (You can enter to win a gift card–but I also have a gift card for $100 to Expressions Vinyl at the bottom of this post! )
 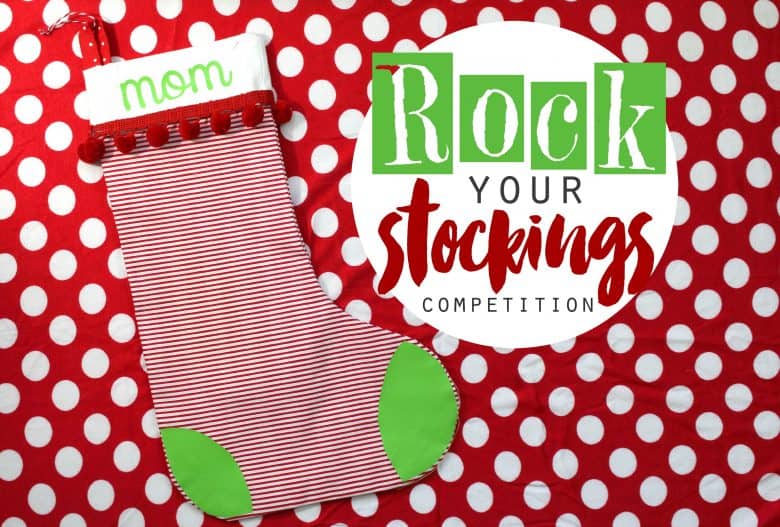 Here are 18 fun stocking ideas that all have Heat transfer vinyl on them!
 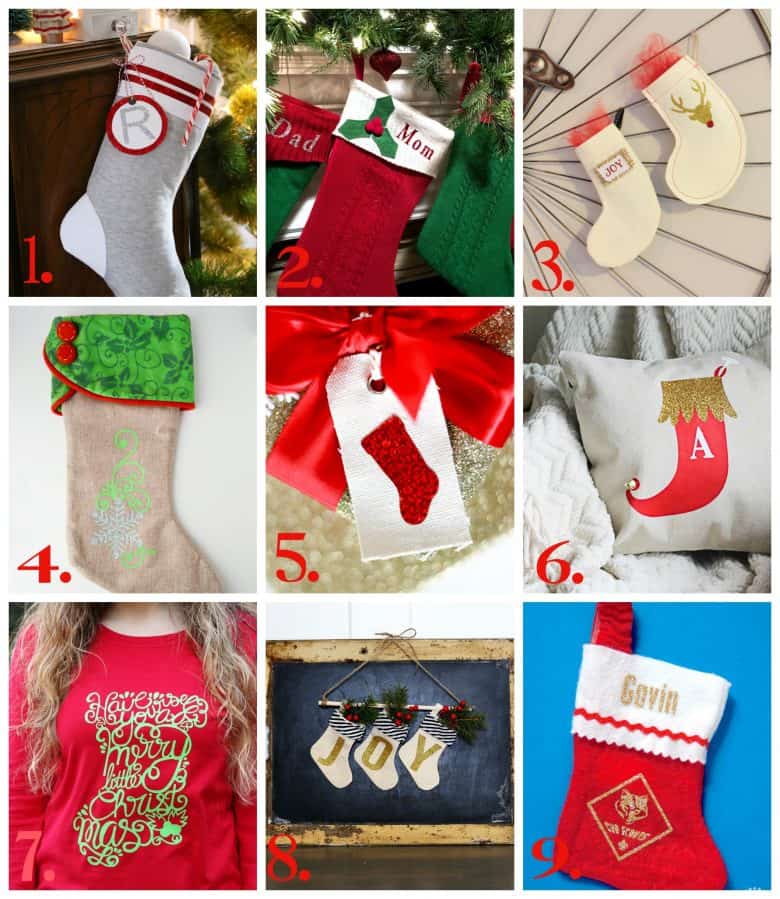 1. Faux wool sock from Fynes Design 2. Personalized stockings from Maybe I will 3. Gift card holder from 733 blog 4. Customized stocking from Artsy Fartsy mama 5. Stocking tag from Strawberry Mommy Cakes 6. Stocking pillow from One Krieger chick 7. Stocking shirt from Pitter and Glink 8. Stocking banner by Sugar Bee crafts 9. Boy Scout stocking from mm scrap shoppe
 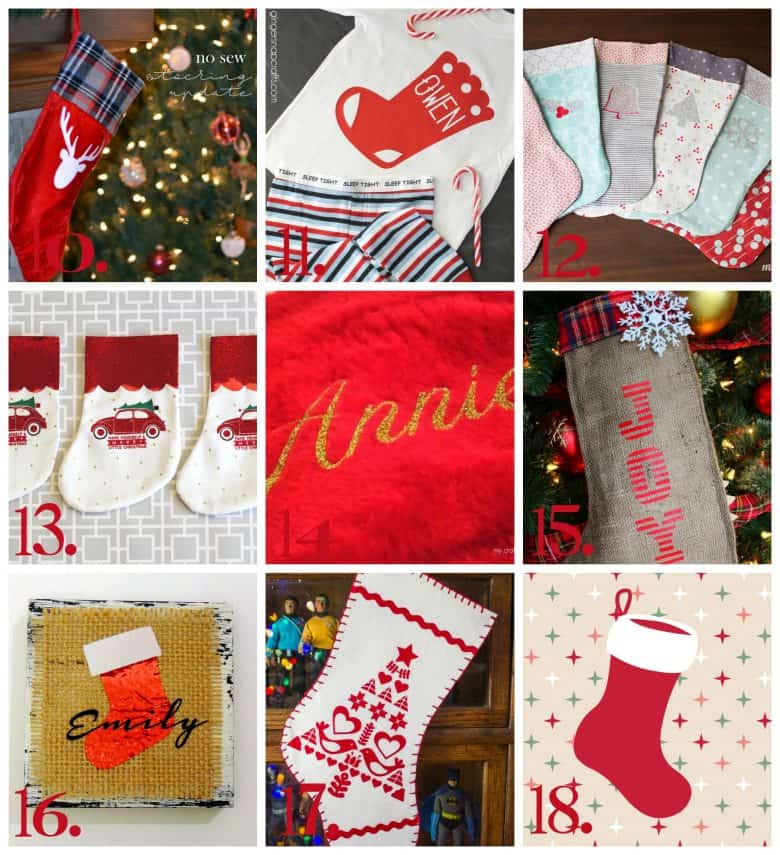 10. No sew from Holy craft 11. Personalized Pajamas from Ginger snap crafts 12. Diy Stockings from Mabey she made it 13. Stocking with car from Kiki Comin 14.Personalized stockings from Craftily ever after 15. Burlap Joy stocking from A girl and a glue gun 16. stocking placecard from Crafting in the rain 17. Scandinavian inspired stocking from Tried and true 18. cute stocking from Flamingo Toes Make sure to enter to win $100 gift card to Expressions Vinyl! Good Luck! a Rafflecopter giveaway [optin-monster-shortcode id=”lawef5acxbj0tow8″]
I love your fabric choices! They look great.
Thanks Kim!
These prints are adorable together! What a great way to be matching but not matching matching, you know.
Thank you! I do love that none are the same but that they all look like they’re part of a whole.
This is why I like your blog so much- the easiest, yet effective ways to complete craft projects-you rock, Lisa!
This is perhaps the sweetest comment of the week. Thank you so much for being here!
I love the shape of these stockings. It’s not easy to find a pattern that doesn’t look funny 🙂 Super cute fabric too!
Thank you Steph–I love a clean, classic stocking.
These turned out so cute! Love the combo of patterns!
Thank you so much–yours looks amazing!
[…] No sew from Holy craft 11. Personalized Pajamas from Ginger snap crafts 12. Diy Stockings from Mabey she made it 13. Stocking with car from Kiki Comin 14.Personalized stockings from Craftily ever after 15. Burlap […]
[…] No sew from Holy Craft 11. Personalized Pajamas from Ginger snap crafts 12. Diy Stockings from Mabey she made it 13. Stocking with car from Kiki Comin 14.Personalized stockings from Craftily ever after 15. Burlap […]
[…] No sew from Holy craft11. Personalized Pajamas from Ginger snap crafts12. Diy Stockings from Mabey she made it13. Stocking with car from Kiki Comin14.Personalized stockings from Craftily ever after15. Burlap […]
[…] πιτζάμες από Χειροτεχνία με τζίντζερ12. Diy κάλτσες από Mabey τα κατάφερε13. Κάλτσα με αυτοκίνητο από Κική […]