


Don’t you love it when you find something to keep you organized and it’s going to fit just right into your life? That’s how this personalized daily planner is. And even though I loved it as is, I wanted to make it a little more personal. So this tutorial is one I originally posted at PinkWhen but it’s still one of my favorite 10-minute crafts. You can’t go wrong with that, right?
Are your kids already back to school? It seems like once the kids go back to school, moms have a chance to get things organized again. Even though my kids aren’t really school age yet, I can feel the back to school energy. I also feel the need to schedule and organize my time and efforts. So the other day I was at Target and found a great little organizer that I can leave on my desk and fill with lists and ideas for blogging (and other things I have to get done). And even though I love the red chevrons, I couldn’t help but personalize it a little.

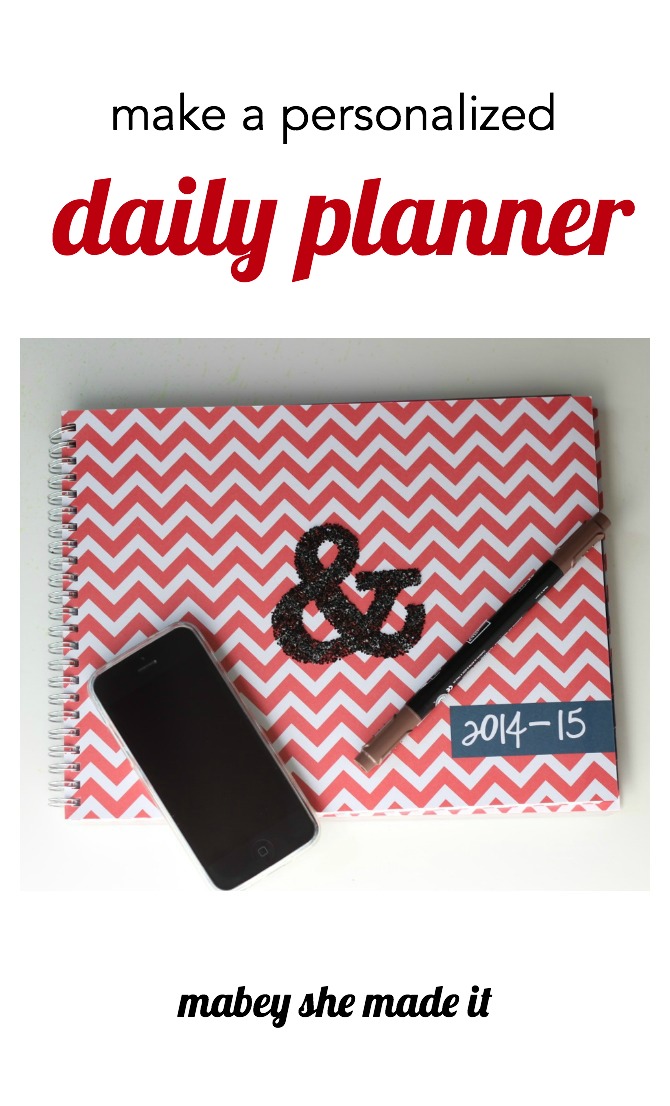
This Personalized Daily Planner is a fun and super easy way to get a custom look with just a tiny bit of work.
You’ll need:
- Silhouette Double-Sided Adhesive Paper

- Notebook or planner
- Glitter
- Silhouette (or other electronic cutter) OR craft knife
That’s really it. So let’s get going!
- Start by cutting a design from your double-sided adhesive paper. It can be a monogram, a graphic, or a symbol. I chose an ampersand just because.
- Peel the backing paper from one side of your image, and stick it to your notebook.


- Peel off the second side, and cover the image with glitter. Shake it off, and you’re done!


Now if you’re worried about playing with glitter, I have a couple of tips that should make it a little less messy although the adhesive sheets are pretty strong, so you shouldn’t have too much glitter mess.
- Make sure there’s no static on your surface before you add glitter. You can take an old dryer sheet and rub it across the surface quickly to get rid of static. Or they make little bags you can use as well.
- Pour your glitter onto your project over a large sheet of paper. Then, when you’re done you can either gather up the paper and throw it all away or use it to pour the glitter back into your jar so it lasts longer.
- Once your glitter is on your project, flick the back side of the paper or surface with your finger. Flick a few times until all the glitter that’s around your project falls off without getting your fingers messy
- Don’t let your 2-year-old help.

Really the last one is the best tip I can give you. But the others are pretty helpful too. 😉
I had so much fun with this idea, I added monograms and flowers to these little boxes for my girls’ rooms–and they helped (which is why that last tip is there). It’s so simple, yet it has big impact and definitely makes organizing your life a little more special.

And I had so much fun making my personalized daily planner that I grabbed two little boxes I had saved for my girls, and added their monogram and a little flower to each of the boxes.
 If you’d like to see more of the boxes, head on over to Mabey She Made It to see the whole project!
Great idea. I love little personalize touches on items I use regularly.