I think you are all beginning to realize how much I enjoy good piece of clothing made from lace. It’s so elegant and girly! Well today’s guest post is Irene from Serger Pepper and she’s been bitten by the same lace-loving bug! Irene is a talented seamstress and has lots of great ideas to share–including this one for a fabulous lace skirt!
++++++++++++++++++++++++++++++++++++++++++++
Hi Lisa, thanks for having me!
I’m Irene and I usually blog at Serger Pepper, writing about sewing, serger tips & tricks, refashion and PDF sewing patterns I love to create: the best part is when sewists from all over the world sew something using one of my sewing patterns and tutorials… I love this part <3!!!
Today I want to share with you and your fabulous readers one of my recent obsessions:
As you can see on my Pinterest Board, I’ve been collecting some great inspiration pics for this garment with no age: it’s perfect from Newborns to Moms (in any size!) .
If you need some tips on working with this material, please check my post about sewing lace!
Let’s see how you can create your own:
(see charts on step 2 for measurements†by size)
1. First of all choose your size on charts below, basing on hips measurements.
You need to know your model’s waist measurement to cut your elastic waistband, also if an average waist girth is provided (maybe you want to make it as a gift and you don’t have access to your model’s waist…)
2. Cut pattern pieces following measurements on following charts, considering that:
Cut the elastic, either using measurements in charts below or measuring your model waist girth and adding 3/4″ (2 cm)
To do that fold the bottom (if you’re using a directional print) long edge to the wrong side, press and repeat.
Topstitch to secure the hem.
To add some pizzaz, I made a contrasting hem facing, faux-piping style, using a strip of the same fabric used for the waistband, long as the lining longer side, 2″ height.
If you like how it looks, fold the strip in half, wrong sides together, aligning the long edges and press to crease.
Align the strip to the hem of the lining part, matching raw long edges.
Press the facing toward the wrong side of the lining: I†like†a little bit of fabric†peeking out, so I pressed it leaving it showing to the front†just a smidge.
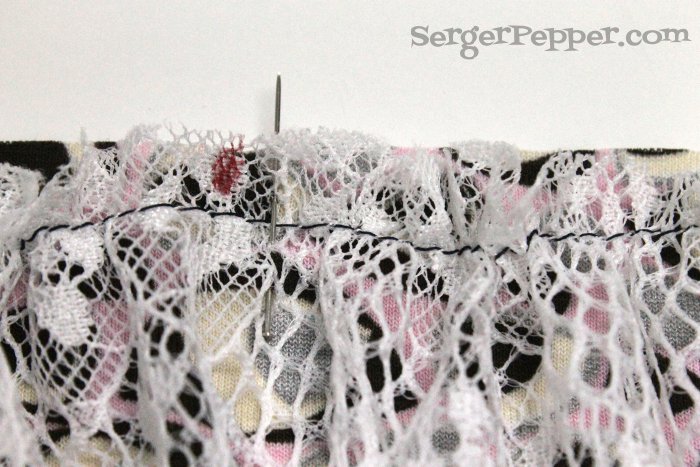
3. Gather both layers on their top long side (opposite to the hem); they need to fit to the waistband length.
To help you putting everything together later, mark with a sharpie a dot at the mid-length on each long side of the waistband and on the top long edge of both lace and lining.
Using a different color on spole/bobbin can help pulling the right one!
Lace to waistband: right sides together.
Help yourself evenly distributing gathers by matching your Sharpie halfway points!
Press seam allowances toward the waistband, on both sides.
Pro Tip: try not to stretch too much your waistband while sewing to avoid a curly seam!
Press seam flat to one side (to “set” stitches in fabric).
Turn the skirt wrong side out.
Right†sides together, press the seam again.
Stitch the second seam enclosing the raw (or sergerd) edges of the first seam.
Stitch across to secure (go back and forth a few times with a zig-zag stitch… just to be sure it’s not coming apart in no time).
Stitch in the ditch of the waistband, placing the two seams (the ones you pressed toward the waistband on Step 5) one on top of the other; leave†the elastic free to move inside its casing.
… can you see the hem facing peaking out? Aren’t they nice?
Time to†relax, laying on the grass, drink some fountain water and make a curtsey…
Ok!†Ready to spin†your Hula-Hoop around the†waist!
I’d love to hear from you: do you like lace skirts? Are you ready to sew one?
See you on Serger Pepper, if you like!
Hugs from Italy
Irene
xoxo
Maybe you're like me, and you find yourself a creative nomad of sorts. I've always…
As promised in my intro post about the Flora and Fauna fabric that's now out…
There’s An Easier Way to Do That You’ve got all the basic sewing tools, and…
I designed a mini collection of fabric! I feel like shouting it from the rooftops,…
Do you ever get a chance that just feels right and you jump after it…
Tips for building a solid pattern library and saving yourself money in the process.
This website uses cookies.
View Comments
This is gorgeous! Love the lace! I'd love for you to stop by and share this at my weekly link party. http://www.thelifeofjenniferdawn.com/2014/09/a-little-bird-told-me-link-party-106.html Hope to see you there!
Sorry I'm just getting back to you--thank you so much!
Gorgeous!! I think the contrast faux piping on the hem is fab!! I've got a Craft Gossip post scheduled for tomorrow morning that links to your tutorial:
http://sewing.craftgossip.com/tutorial-layered-lace-skirt-2/2014/09/08/
--Anne
Thank you so much for featuring this skirt, Anne. I always love checking out Craft Gossip!
just a thought about questionable waist measurements: embed a wide (2") satin ribbon in the waist seam, leaving free and hanging down at the outside of the skirt for perhaps 20". then the wearer could tighten the ribbon to her waist, then tie a big, beautiful bow to flow down and the skirt would fit perfectly. what do you think?
Ooh, that sounds like a neat idea! I'll have to give it a try!