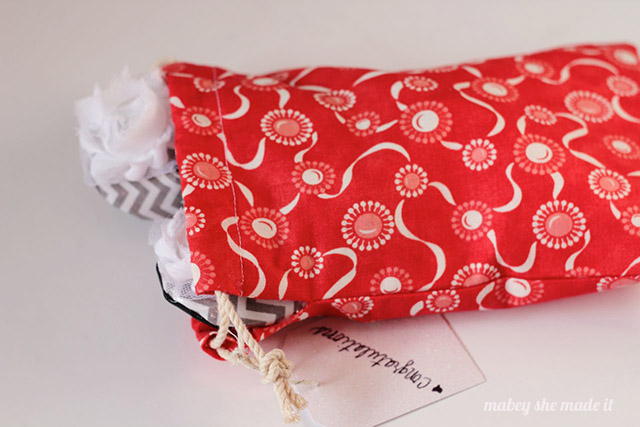
When you sew, it’s so much fun to give little handmade gifts. And it makes your gift even more special when you can present it in something equally cute and handmade. Today I’m sharing this drawstring gift bag that I made for a pair of baby shoes for Create. Craft. Love. last month. And it only takes a fat quarter and some rope twine to make!
 The other day I was making a little baby gift for a friend, and I started to think about how I wanted to give them to her. I didn’t have a small box that I liked, and I didn’t want to put it in a regular gift bag. I wanted it to be fun and different.
So I grabbed a fat quarter and whipped up this little drawstring bag for the little shoes to fit into. And today I’m going to share how I made it with you so you can make one too. Hi, I’m Lisa from Mabey She Made It, and let’s get started!
 Drawstring Gift Bag Supplies:

- Fat quarter (you can get several bags out of one fat quarter)
- Cotton rope twine
- Sewing machine and thread
- Iron

Instructions:
- Start by cutting two pieces of fabric 9″ x 6″ and two pieces of rope twine 18″ long.
- Fold and press a 1/4″ at the top of each piece of fabric, then fold down and press another 1/2″ for each piece. Sew along the part you just folded to make a casing for the rope to go through.

- With right sides together, sew around the remaining three sides, starting and ending before the top casing (so it stays open). Remember to backstitch (or stay stitch) at both ends.
- Clip your corners, and turn it right side out. Press your bag.
- Take one piece of rope, and wrap a little tape around the end to help you thread it through the casing. Start one one side, and go all the way through.

- Then take that same end, and go back through the other side so both ends of the rope are hanging out the same side. Tie these ends together.

- Take your second piece of rope and thread it through the casing starting on the opposite side (the side without the tails). Thread it through the first side, then continue through the second side until your tails are both hanging out the opposite side as the first rope.

- Tie the ends together, and you’re done!

Now just put that cute little gift inside and add a tag for pure cuteness.
This would be fun for a onesie, accessories, or any other small gifts you can think of. Not only will they get a fun gift but a super cute way to store/carry it.
If you’ve enjoyed this project, I’d love it if you came over to Mabey She Made It and checked out some of the other projects I’ve got going on. And I’d love it if you followed me on Facebook, Twitter, Pinterest, Google + and Instagram.


I'd love to hear your thoughts–leave me a comment!