If you saw my post yesterday about sewing swimsuits for the blog tour but aren’t sure you are ready to jump in (hah!) yourself, I’m here to help you out.

I totally get the intimidation of sewing swimsuits, but to ease any hesitations you might feel I’ve put together a list of sewing swimsuit tips and tricks to help you get started without frustration (and even some troubleshooting tips, too!). Plus photos of my kids’ new suits for fun.

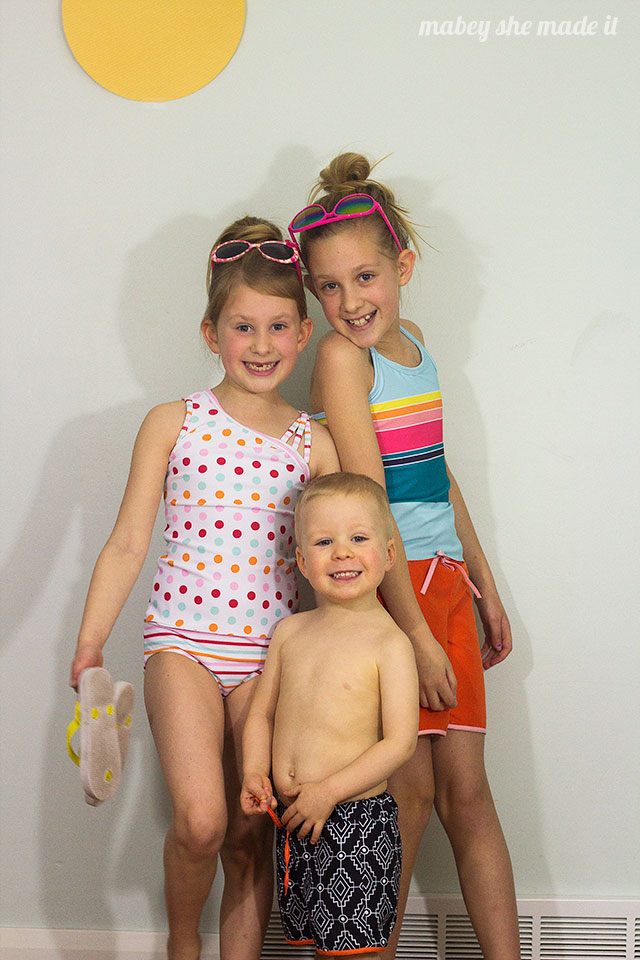
Before we start though, all fabric in this post graciously came from Raspberry Creek Fabrics and I used the following patterns:
- Jalie Asymmetrical Gymnastics Leotard
- Sew a Little Seam Children’s Mairin
- Sew a Little Seam Linden Shorts
So let’s dive into the deep end so you can get comfortable sewing swimsuits!
Planning and Materials
- Use the right fabric. Swimsuit fabric can range in thickness, quality, and stretch. The thinner and more slinky the fabric, the trickier it will be to sew. The lower the quality, the less time your suit will look good. So choose good fabric from the start. And Raspberry Creek Fabrics swim selection is not only top quality but so many super cute prints and coordinates as well. Seriously, go check them out!
- Line your swimsuits. Lining seems like just an extra step, but it really helps in the quality of your swimsuit and how long it will last you. Swimsuit lining is also an excellent muslin material because it’s inexpensive and you won’t waste your cute prints if you need to adjust. You can also use the same swim fabric to line your suit if you don’t want to get lining, but either way, the extra layer helps your suit look great and last longer. Also, power mesh is awesome for helping add structure to your suit in problem areas, but don’t mistake it for lining–they’re different!
- Use clear or cotton swim elastic (not polyester). Polyester elastic will break down with the chlorine in the pool, so be sure to either choose clear or cotton swim elastic–especially if you’re in the pool a lot. Here’s the 1/4″ clear elastic I used or the cotton swim elastic which is easier to use and softer.
- Practice first. Seems like obvious advice, but it’s still best practice to test everything out before your finished project.
- Measure accurately. There’s nothing worse than getting to the end of a swimsuit and finding it doesn’t fit correctly. Measure yourself accurately to start with and blend sizes if you fall in more than one size (me!).

Cutting
- Stretch your elastic before measuring. You don’t want your elastic to stretch out after it’s already on your suit, so give it a good stretch a few times before cutting.
- Cut carefully. Have you ever bought a shirt and after the first wash the side seams were always twisting around your body? That happens when something isn’t cut on grain, and it’s awful. To avoid this, make sure the stretch guides on the pattern pieces are lined up exactly to the fabric grain–we don’t want twisting. Also, cutting a single layer (rather then on the fold) can help you keep everything exactly how you want it.
- Use a rotary cutter. While we’re talking about cutting, may I strongly suggest using a rotary cutter and weights? Since swim fabric can get slippery, a rotary helps you get the straightest and truest cuts. Bonus? It’s faster too. I use this smaller 28mm rotary cutter to get a tighter cut around corners and love it.

Sewing It Up
- Use the right needle and thread. Stretch needles and stretch thread my friends. Stretch needles are blunt and will go in between the fibers of your fabric instead of puncturing them (no one wants little holes all over their new swimsuit). And pick up a stretch double needle too for hemming. It makes a TON of difference. And what is stretch thread you ask? It’s called Wolly Nylon (or Maxi-Lock Stretch) and it’s soft and stretchy and allows lots of give in your stitches. Use it as your bobbin thread on your sewing machine or the loopers on your serger and you’ll avoid popped stitches later on. It’s amazing.
- Use a stretch stitch. Everything needs to stretch, so use a stretch stitch such as a zigzag or the one that looks like a lightning bolt for better seams. Using a double needle also allows for stretch on your hems.
- Keep your elastic tension even as you sew. The more you stretch your elastic as you sew, the more it will curl, and if you don’t stretch evenly, you’ll have places that are tighter than others which looks silly. For most of the areas on your swimsuit, just use a light tension (not stretching) as you sew. The exception is along places that curve outward like around the back of the leg openings where you want the elastic to curve around your booty a little more.
- Sew your cups in as late as possible. Ask me how I know this one…ahem. I had to go in later and remove and reposition them to actually fit where they should. To find the best position, I tried on my suit and placed my foam bra cups inside, pinning them in place. Then I sewed them in place. These are the bra cups I bought.

Troubleshooting
So what if you run into trouble along the way? Check here for suggestions that will help fix those problems.
- You want negative ease. Most of the time negative ease it built into the pattern, but if you try your swimsuit on and it’s loose, you’ll want to tighten it up. When you get into the water, your swimsuit fabric will get heavier and tend to either fly away from the body or sag if it isn’t tight enough. And no one wants a saggy bottom. So if you’re experiencing these problems, take in your side seams or tighten that elastic.
- Try a walking foot. If you’re finding you have wavy seams or that you’re having a hard time getting over thicker areas (such as bindings), try a walking foot which pulls the fabric through the machine by utilizing the feed dogs on the bottom and the foot pulling the fabric on the top.
- Take your time. Swimsuits aren’t necessarily the quickest of sews. And because of all the stretching and the tendency of the fabric to slide, just plan to take your time. Going slow will help you get a great finish.
- Always put elastic in your straps. They may stay up on dry land, but straps need a little elastic so they don’t stretch and fall off when wet. Also, if they’re falling off in the water and you have elastic already, try repositioning the strap or tightening it to make it a bit shorter.
Still not ready to tackle swimsuits on your own? Try this online Sewing Swimsuits class from Bluprint.


I'd love to hear your thoughts–leave me a comment!