I don’t know about you, but I love the look of etched glass. It’s fabulously subtle and classy at the same time. Whether it’s on windows, mirrors, or in cabinets, I just adore how the etched design elevates the piece.

I also love the idea of having your name on your pans so when you take food somewhere there’s no confusion as to whose the pan is. And glass etched names look way better than masking tape stuck to the bottom, right?

The best part is that making your own glass etched bakeware is really easy. REALLY easy.
- Put on a mask/design using contact paper or vinyl,
- Slap on a thick layer of etching cream, and then

- Wash it off after 5 minutes. Peel up your vinyl, and you’re done!

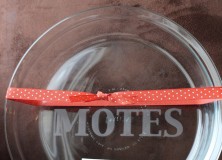
And while it’s fun to get really fancy with your designs, they can be really simple as well. Mine was a simple last name.
For this project, I used my Silhouette to cut out a vinyl name, but in the past I’ve done some patterns using painter’s tape and a large paper punch. Whatever you use, you’ll love the way it turns out!
Creating your own glass etched bakeware is such a simple process, I thought I’d leave you with a couple of tips I have found helpful.
- Always start with clean glass. Fingerprints and other oils can affect the way your glass accepts the cream and design.
- Make sure the vinyl or contact paper is pressed down really well around the edges of your design. If the cream gets under the mask you’re using, you’ll see it on your finished project.
- Leave enough vinyl or tape around the outside of your design that the cream doesn’t touch the glass where you don’t want it to. This stuff works fast!

- You probably won’t see the etching when your time is up, but trust me that it’s there. It won’t show up until the glass is dry. The first time it’s a little intimidating to lift up your mask hoping it took and not see anything, but it’s there! (See the photo above where the glass is wet…it’s there you just can’t see it yet!
- When your 5 minutes is up, carefully scoop the cream back into your jar, and you can use it again. One bottle lasts a long time.
- I used the negative space as my mask, which means you still have a perfect image to use again on something else.

- If you want the image to be on the outside of the bakeware, remember to cut the word backwards. I’ve never noticed it being much different on the front or the back of the glass though for this type of project.

Most of all, have fun!


I'd love to hear your thoughts–leave me a comment!