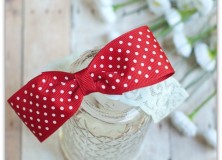
Are you ready for another super cute hair accessory? This time, Deanna from Sew McCool is showing us how to make a simple but stylish baby bow headband. Heaven knows my kids need these when they’re little! Deanna is another amazing seamstress. I’m so lucky she wanted to come share with us today! She loves to quilt, sew, and make cool things out of ribbon–this headband included! So let’s let her have the floor!
++++++++++++++++++++++++++++++++++++++++
I’m Deanna from sewmccool.com, and I’m so excited to be a guest on Lisa’s blog today!
I don’t have any more babies (though we did just adopt a 2-year-old Shih-tzu – Maltese mix dog from a local shelter), but I love making baby headbands for others. They’re quick and inexpensive to make, and they’re great gifts for new moms with girls!
So…you guessed it…..
….today I’m going to teach you how to make a bow baby headband.
I’m a sewist and quilter first, but I spent 6 years exclusively making hair bows…selling them…and writing tutorials on how to make them. My first book, “50 Ribbon Rosettes and Bows to Make,” (that’s an Amazon affiliate link) will be released by St. Martin’s Press on Sept. 2. If you enjoy working with ribbon, you’ll love the book! And feel free to enter my giveaway to win a free copy!

What you’ll need
* 12in of 1 1/2″-wide grosgrain ribbon
* 5in of 3/8″-wide grosgrain ribbon
* Stretch lace cut 1″ smaller than the baby’s head (for a newborn, cut this to 12 inches; one month and older, cut to 14 inches)
* Chenille needle
* Perle cotton thread
* Wood-burning tool, lighter, or seam sealant
* Sewing machine and regular sewing notions
* Hot glue gun and hot glue
How to make a baby headband
Gather your supplies! Then, using your sewing machine, sew the short edges of the lace with a 1/4″ seam allowance, right sides together, as shown in the second photo below. Be sure to back stitch at the beginning and end. Turn the headband right-side out, and set it aside.

Seal the ends of the 1 1/2″ wide ribbon so they don’t fray, using either the wood-burning tool, lighter, or the seam sealant. Thread your chenille needle with the perle cotton, and knot the end….then set it aside for now. Need a quick needle threading tip? Learn a couple of “secrets” in this post.
Next, fold the ribbon in half to find the center.
Open the ribbon back up and fold the left side toward the center, and overlap the center mark by an inch or so (shown in the top right photo below). Repeat with the right side.

Now insert your threaded needle from the bottom of the bow and pull it through. Fold the center of the bow like a fan, as shown in the top right photo below. Finally, wrap your thread around the center a few times and knot it in the back – but don’t cut the thread yet!

Fold your headband in the center where you sewed the seam. Place the center of the bow over the folded section and push the threaded needle into the headband. Make sure the bow is straight, then wrap the thread around the center a few times. Knot the thread in the back and clip.
Place the center of your 3/8″ ribbon over the center of the bow and use hot glue to secure it place. Wrap both sides around the back, trimming and sealing the ribbon as needed, and hot glue in place (bottom photos below)

And that’s it! Your baby headband is ready for your little one to wear…or for you to give as a gift!

______________________________
Deanna McCool writes for sewmccool.com. To make sure you don’t miss any fun tutorials, please follow SewMcCool by e-mail! Thanks so much, Lisa, for allowing me to be a guest contributor here today!


I'd love to hear your thoughts–leave me a comment!