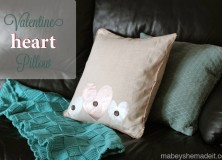
You may have seen my Valentine Heart Pillow last week, but I’m bringing it home this week so it’s part of my collection. I mentioned it last week, but I LOVE this pillow! Like leave-it-up-all-year-round love it. The neutral palette is just right for my tastes, and I hope you like it!

++++++++++++++++++++++++++++++++++++++++++++++++++++++++++++++++

Good morning WHWN readers! Hi there! I’m Lisa Mabey and I blog at Mabey She Made It about DIY projects, crafting, and sewing. I’m excited to be here again sharing some Valentine love with you!
If you’re like me, sometimes you want to decorate for a holiday, but you don’t necessarily want to follow tradition too closely. Take Valentine’s day. When you think about the holiday, visions of red and pink dance through your head, right? I like red, and I’m coming around to pink, but it doesn’t really go with my decor. And even though it’s only for a month or two, I tend to shy away from those colors in my living room.

So when I wanted to create a Valentine heart pillow sham, I knew I wanted hearts but wasn’t sure about color. After going through some paint colors (and consulting some friends on my Facebook page), I found this fun bronze color, and knew it was perfect for my pillow.
Here’s how to make one:
Supplies:
- Linen
- Contact paper or vinyl
- Craft knife or electronic cutter
- Foam brush
- White pearl acrylic paint
- Bronze pearl acrylic paint
- Fabric Medium
- Pom-pom trim
- Buttons
- Pillow form
Steps:
- Cut your linen to the right size–my pillow (it’s a Christmas pillow actually) was an 18″ square so I cut my front piece 18.5″ square and then cut two back pieces 18.5″ x 24″
- Cut a big and little heart stencil from your contact paper using a craft knife or electronic cutter. Hearts are fun to free hand or you can find something to trace. Place the stencil on the pillow front, and press around the edges to get a good seal.

- Mix paint and fabric medium together (use directions on the fabric medium for the ratio), and dab the paint inside the stencil area. Try not to wipe or you’ll get bleeding under the stencil. Stencil the second little heart as well.

- Use the big stencil and the bronze paint once the little hearts are dry. Let bronze paint dry.

- Sew buttons onto the center of each heart and baste pom pom trim around the edges of the front piece. Now you’re ready to construct the pillow!

- Take your two back pieces and finish one of the 18.5″ edges on each piece by either turning 1/4″ and again another 1/2″ and hemming on your sewing machine or serging/sewing a 1/2″ hem. These finished edges are the envelope portion where you’ll stuff your pillow in.
- Lay the front piece on a flat surface, and with right sides together lay your back pieces on the front piece with finished edges toward the center of the pillow. They’ll overlap several inches, which is good. Pin the layers together.

- Sew around the edge of the pillow, sewing on the basting line of the pom pom trim. Now trim your corners, turn, and stuff your pillow inside!
It’s neutral, so it’ll go with pretty much everything and I love the sheen of the hearts.

They’re so pretty and subtle without being over the top. I’m also loving how the buttons attract your attention to the hearts so you don’t miss them.
The subtle pom pom trim also makes the pillow stand out against its surroundings. I love how it adds that subtle detail but also makes it look more high-end.
I hope you liked making a pillow with me–feel free to come visit me any time!


I'd love to hear your thoughts–leave me a comment!