Today I’d love for you to meet Ula from Lulu & Celeste, a cute blog full of beautifully sewn clothes and other fun projects. Ula does a lot of pattern testing–especially for her two daughters (so cute), so if you’re curious about a new pattern coming out, you’ll want to check out her blog to see if she’s already sewn it up! And of course, she does other crafting as well, you’ll just have to go see for yourself!
+++++++++++++++++++++++++++++++++++++++++++++++++++++++++
Hi! My name is Ula and I blog over at Lulu & Celeste. I’m mama to two little girls, one 4-year-old and one almost 1-year-old (wah! I refuse to believe she’s almost 1!). I mostly blog about the pattern testing I do for my girls and some of my other sewing adventures.
Thank you Lisa for having me! I’m here today to share a baby bunting tutorial with you.
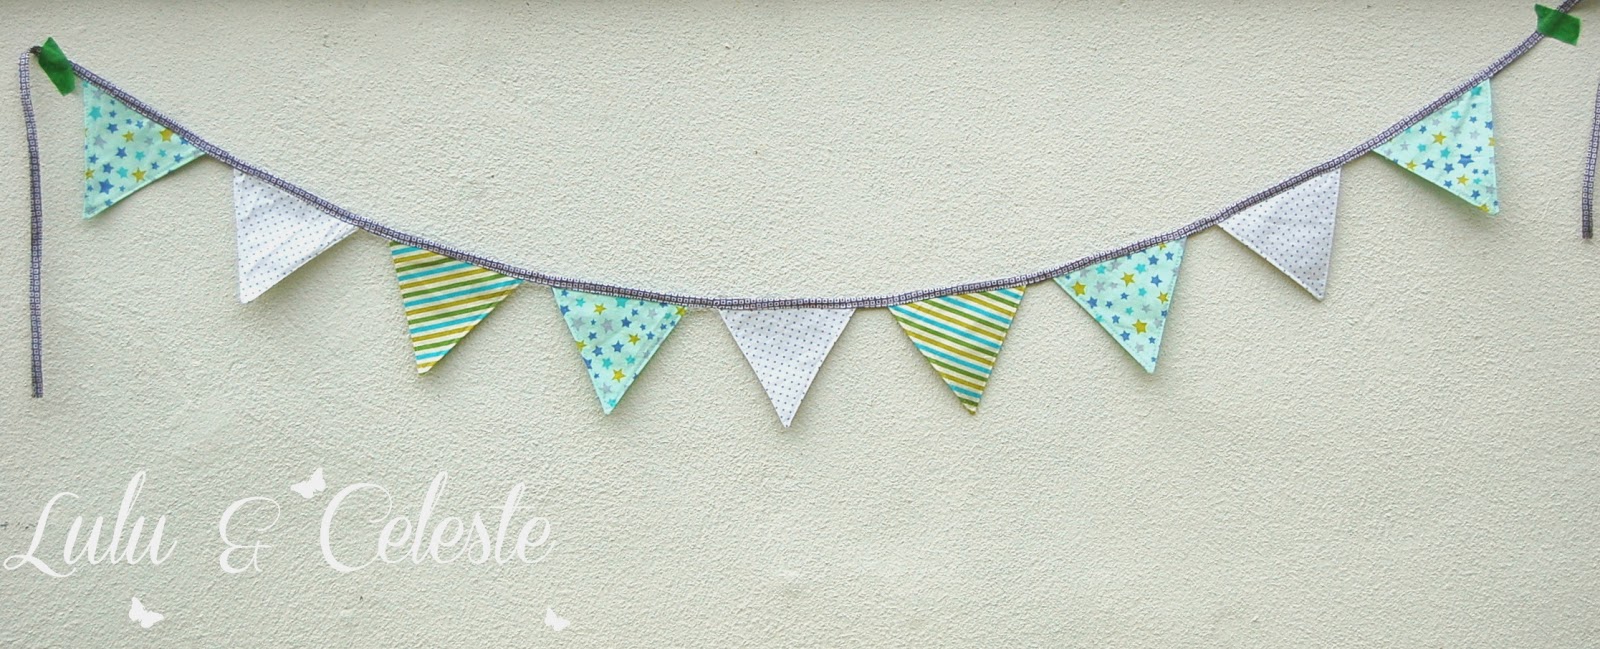
I made this bunting to use as decor for my sister-in-law’s baby shower, I think it tuned out cute! The bias tape was made using the continuous bias tape method. It’s actually not that hard but you could use store bought bias tape if you prefer. There are many ways to make bunting, this a double-sided sewn version with hidden seams. My bunting is 6′ long, with 9 flags/triangles each measuring approximately 5.5″ in length.
Gather your supplies:
Let’s get started!
Maybe you're like me, and you find yourself a creative nomad of sorts. I've always…
As promised in my intro post about the Flora and Fauna fabric that's now out…
There’s An Easier Way to Do That You’ve got all the basic sewing tools, and…
I designed a mini collection of fabric! I feel like shouting it from the rooftops,…
Do you ever get a chance that just feels right and you jump after it…
Tips for building a solid pattern library and saving yourself money in the process.
This website uses cookies.
View Comments
adorable !! Thanks for sharing !!
Adorable and simple--love it!
Thanks for having me! :)
Thank you, Ula! I love this bunting!