Today I’m bringing home a tutorial for my Friendship Cuffs–they’re a cute way to greet your friends after the summer apart or for any reason really. They’re great for kids, teens, and adults alike!
**********
Hello all you Crafty Cupboard readers! I’m Lisa Mabey from Mabey She Made It, and I’m delighted to be sharing Melanie’s space today.
When I was brainstorming ideas for this post, I asked my husband his favorite part of going back to school (knowing full well that he didn’t particularly like school). I got a blank stare. Then he thought for a moment and answered that he DID like seeing all his friends after the break. I had to agree with him on that point, and I loved school.
I think that may be almost everyone’s favorite part, but amid all the school supplies, new clothes, teacher gifts, and special breakfasts, we never do anything for our friends! So I thought I’d change that. Introducing the Friendship Cuff: an updated friendship bracelet for all your friends just to say that you are glad to see them again.
These friendship cuffs are quick to whip up, but you can embellish and personalize them as much as you want–no one’s going to be grading you on them. 🙂 And whenyou’re finished, just slide them on this free Friendship Cuff printable, and they’re ready to give! And depending on the material you make them from, they can be awesome for boys or for girls.
Ready to make one?
If you want it to be reversible, you’ll need two coordinating fabrics plus a scrap of fusible interfacing. These don’t take too much fabric, so they’re great for those scraps of your favorite fabric you just couldn’t throw away! You’ll also need elastic cord and a couple of buttons.
For the larger cuff mine was 2-1/2″ wide by 7″. My wrists are about the size of the average child (odd, I know) and the smaller cuff fit but didn’t slide around while the larger cuff was just right on me.
2. Fuse the interfacing to the wrong side of one rectangle.
3. Put your two fabric pieces right sides together. On one of the short sides, slide a folded elastic cord (or a hair elastic would also work great) between the layers so the cut edges stick out just a little.Pin them in place, then sew around the edges (1/4″ seam allowance) leaving a 1-2″ gap.
4. Clip your corners so you can get nice sharp points, then turn your cuff right side out. Press it all flat, and top stitch around the edges, closing up your gap.
5. Mark where your button(s) should be by placing the ends of your cuff together and marking where the elastic reaches. If you want it to be reversible, sew two buttons back to back (on either side of your cuff) and you’re done!
6. Or, if you only want to wear it on one side, sew a single button on the side that will show.
7. If you’re feeling really fancy, you can even embellish your cuff. I did a row of sequin on the small friendship cuff (but it’s only sewn through one layer, so it can still be worn on the other side) and an embroidered design on the larger cuff (which shows on both sides, but looks fun either way).
Your friendship cuffs are done!
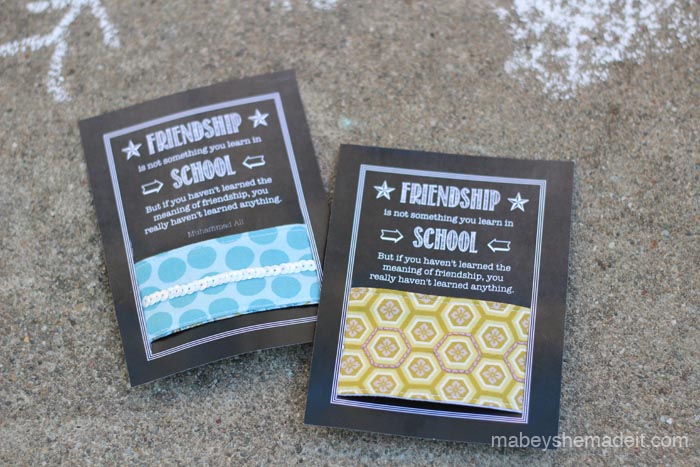
Now print the Friendship Cuffs cards on cardstock; there are four to a page so you can easily make several for your friends. Trim the edges, then cut a slit on either side of the card near the border like this:
Now slide your friendship cuffs in and button it up.
It’s ready to give away!
I loved the look on my daughter’s face when she got to give her friend a little present just like hers.
I hope you enjoy making these friendship cuffs and that you’ll come visit me at Mabey She Made It! Thanks again for having me, Melanie!
***********
Lisa, these are such a cute idea! I know all my girls would love this!
Don’t forget to head over to Mabey She Made It for a tutorial for this cute Teacher Tote!
As promised in my intro post about the Flora and Fauna fabric that's now out…
There’s An Easier Way to Do That You’ve got all the basic sewing tools, and…
I designed a mini collection of fabric! I feel like shouting it from the rooftops,…
Do you ever get a chance that just feels right and you jump after it…
Tips for building a solid pattern library and saving yourself money in the process.
This website uses cookies.