


Updated April 2019
Creating DIY clothing labels is such a rewarding and fun finishing step to making your own clothes. You turned two-dimensional fabric into an item you can wear or show or use. There’s something about that creative accomplishment that makes you want to declare to the world that you made it.
For these times, use these creative and unique DIY and customizable solutions. This post will help you figure out what kind of DIY Clothing tags you want and point you to how to make them.
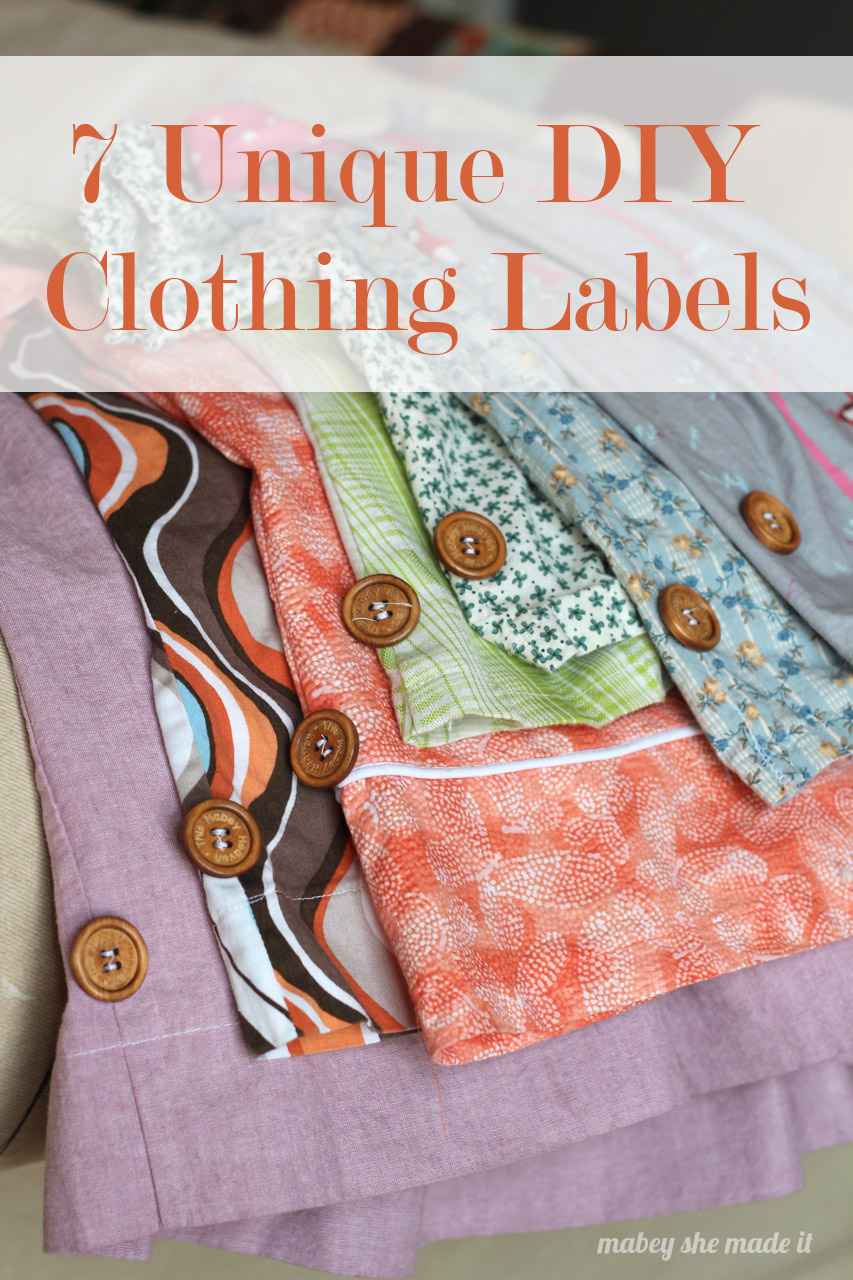
Personalized Button DIY Clothing Labels
So along with keeping and loving some of the pieces I’ve made, I also wanted a way to “tag” them as my creations. So I started looking around at some fun options, and ultimately decided to try something a little unique.
I had these buttons personalized through Pick Your Plum (no longer available) and ordered a bunch of them. They were fairly inexpensive, and I loved the idea of being able to put buttons on the girls’ dresses that were a little personal. A little while after they came, though, I started putting them on the left side seam near the bottom as my sewing signature.
Although these exact buttons aren’t available, here are some Etsy shops that personalize wood buttons for you.
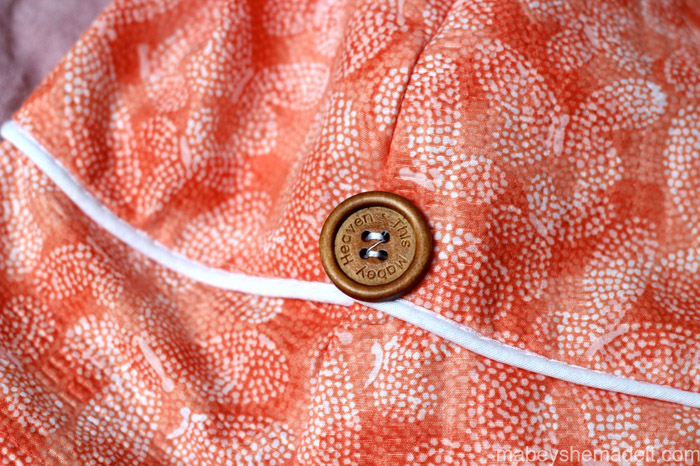
If you look through the sewing section, you’ll notice them here and there on tops, skirts, and dresses mostly. I love that I have an easy way to identify the pieces I’ve made and to start a sort of brand, even if it’s only for my own kids.
The pros to this method are that they don’t itch, they’re visible, and they aren’t ruined in the wash. The cons are that I have to sew on an extra button.
Printed Ribbon Labels
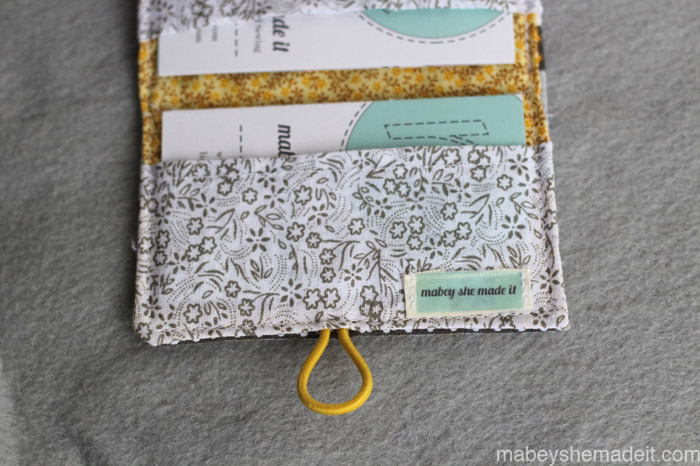
Here’s another easy way to add a label to your sewn goods. These printed labels on ribbon were fun to create and were the perfect tiny little accent to these Business Card Holders. The pros here are that you can make a bunch fairly quickly. The cons are that I think they’d wash out eventually (but I figured a business card holder isn’t going to be washed a lot so I haven’t tested this theory) and that you have to have an ink jet printer to make them.
Stamped Twill Tape Tags

This tutorial for stamping your twill tape labels is another great way to make your labels. It’s simple, cost effective, and you only need some very basic supplies to create them. You can go with simple colors like this tutorial at Crafty Blossom, or step it up a notch and dye your twill tape to differentiate sizes like the divine Katy at No Big Dill.

Embroidered Tags
Another amazing example of unique clothing labels from Katy is to embroider your brand on each piece. I especially love the detail on this white dress with the detailed “No Big Dill” on the back. So gorgeous.

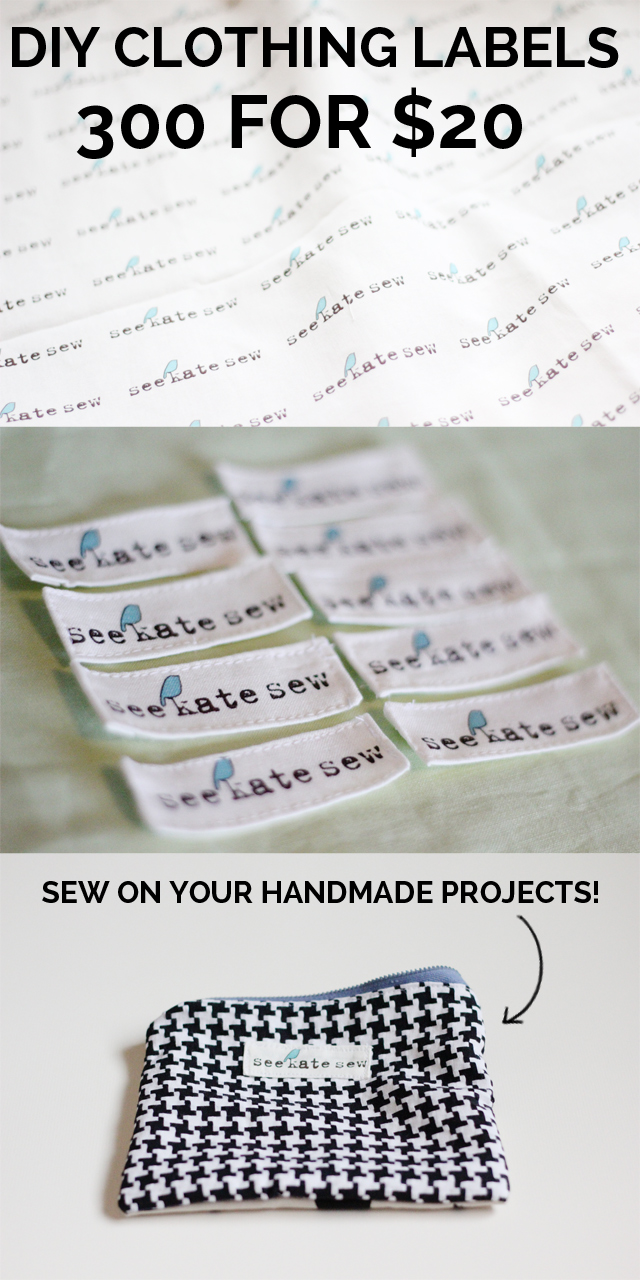
Printed Fabric DIY Clothing Labels
If you want to go a quicker route, how about having your logo printed on fabric and using the fabric as your labels? This awesome tutorial over at See Kate Sew looks great and would be durable as well. And it’s pretty cheap when you consider how many labels you’re getting!
Silkscreened DIY Clothing Labels
And finally, if tags are too itchy, why not silkscreen your clothing labels on like the pros? Ashely shows you how to do it in this tutorial, which would be so cool to learn how to do. And would look incredibly professional.
So which of these DIY clothing labels methods is your favorite? Have you tried any of them?
DIY Clothing Labels
So which of these DIY clothing labels methods is your favorite? Have you tried any of them?

DIY Stamped Twill Tape Clothing Labels
This tutorial for stamping your twill tape clothing labels is another great way to make your labels. It’s simple, cost effective, and you only need some very basic supplies like twill tape, fabric ink, and your stamps to create them. You can go with simple colors and designs like this tutorial at Crafty Blossom for something that's easy to replicate.

DIY Size Tags (Or Color Coded Tags)
I love the idea of using colored tags to differentiate by size or child. Katy dyed her twill tape a rainbow of colors and had fun stamping names, sizes, and messages on her kids' clothes.

Fun in the Sun{dress}: All in the Details
Another beautiful idea for creating DIY clothing labels is to embroider your name or brand on the pieces of clothing. Katy is the best example of this--you'll find her blog name embroidered on many beautiful pieces like this sundress.

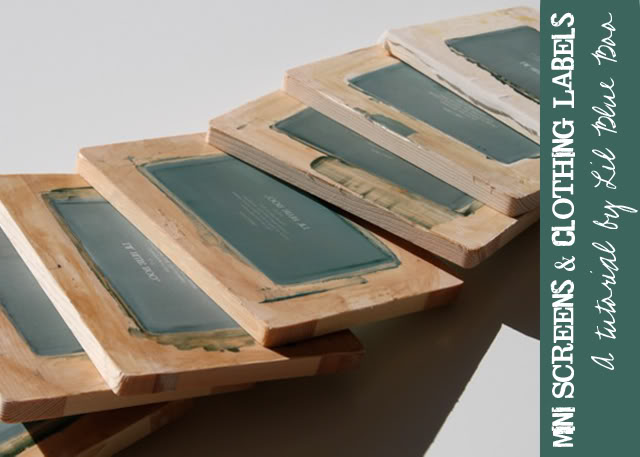
Mini Silk Screened Clothing Labels
If you're trying to make clothing labels for sensitive skin or if you just don't like having loose tags on your clothes, give this silk screened version a try. Create a mini screen and then print your label right onto the clothing. Brilliant.

Qty 200 - Custom satin clothing label - Custom Garment label - Printed clothing labels - Custom brand label - Custom logo label
IF you have your design set, but don't want to print your own, try using an Etsy shop like this one to create custom labels using your design. They're pretty cost effective, and easy to slip in while you're creating.

Print Label Fabric
Kate's solution for DIY clothing labels is to put your logo on repeat and print it at a fabric printing website such as Spoonflower. She got 200 labels on a 1-yard cut and was able to cut and sew the fabric into labels.

DIY Clothing Labels: What Are My Options?
Print on fabric right from your computer at home with this tutorial. Check to make sure your printer is the right kind, and then go for it! I love that these are super fast and a bit more durable for throwing in the washer.
I’ve never seen the button labels, but now I have to have some of my own!
I’ve loved them, and am keeping my eye out for them to go on sale again.
I bought the personalized buttons from Pick Your Plum, too. I went crazy and ordered more than enough. I love the idea of using them as a clothing label… very creative!
Nice! I need to get some more when they come around again. 🙂
Great ideas. I went from feeling I could never afford nice labels to having several affordable options. Thanks.
Yea! That’s exactly what I was hoping for, Elena. You made my day.
Hi! I have found that if you have a laser jet you can print directly onto the ribbon. Simply take a piece of regular paper. Figure out how many rows of ribbon will fit on your paper. I use 7/8 inch so I can get 9 rows (landscape). Figure out how much room is left and divide it by 2. This is the margin on each side. Draw a line down each side with this margin. Then spray your paper with temporary spray adhesive. Stick your ribbon to the paper following the lines. Trim the edges. Now all you need… Read more »
Thanks for your tips about how to create your own clothes, Lisa. I like your tip about using silkscreened clothing labels. If you get them a little bit bigger, you can make screen print t-shirts. This can be a great idea for sports teams or events. However, you can always order t-shirts like this online if you don’t have the materials or times. Thanks for the ideas.
Thank you–silkscreened labels sound so awesome.
I agree. It can really make your business or label look professional.
A debt of gratitude is in order for your tips about how to make your own garments, Lisa. I like your tip about utilizing silkscreened dress marks. On the off chance that you get them a tiny bit greater, you can make screen print shirts. This can be an awesome thought for games groups or occasions. Be that as it may, you can simply arrange shirts like this online in the event that you don’t have the materials or times. A debt of gratitude is in order for the thoughts.
Thanks for the tutorial! I’ve been running muslin through printers for the last 15 years using various printers and have had great success. However, the HP 1507 I have now doesn’t like the thickness of the fabric and freezer paper even though it looks very similar to your printer. I’m using the HP transfer setting and hand feeding the sheets and they still jam. I tried spraying heavy starch and that helped some but the jersey seems to want to curl no matter how much pressure I use in ironing to the freezer paper.
You can buy freezer paper at some grocery stores, but I buy the heavier stuff already cut in 8×10 sheets at the same online place I get the bubble jet set. I asked at every store – they don’t have it – and one employee told me she has to get hers online too. Local Quilt shops might have it. The freezer paper is waxy on one side, that’s the side to put on your fabric. When you iron it, the wax melts and sticks to the fabric. Very easy. Any natural fiber should take the printer ink. 100% silk… Read more »
Much obliged for your tips about how to make your own garments, Lisa. I like your tip about utilizing silkscreened apparel marks.
I see you don’t monetize your website, don’t waste your traffic, you can earn extra bucks every month because you’ve got high quality content.
If you want to know how to make extra $$$,
search for: Ercannou’s essential adsense alternative
I use little pre-made ribbon rosebuds as a signature. I tall recipients that when they see it to remember I love them.